Domo is a business intelligence platform that enables companies to connect data sources, visualize metrics, and drive decision-making through real-time analytics. It supports data-driven insights with tools for dashboards, collaboration, and customizable reporting.
What you can do with Domo and Profit.co Integration?
With the Domo and Profit.co integration, you can seamlessly import OKR performance data from Domo’s analytics platform into Profit.co.
Configure Domo in Profit.co
Note: Only the super user can enable this integration, but once activated, it will be available for use by all users.
Step 1
Navigate to Settings from the left navigation panel. Click on Integrations, Select the User Level tab, and enable the Domo toggle.

Step 2
After enabling it, navigate to Preference from the left navigation panel, select the Integrations tab, and select the Domo Manage button to make a connection.

Then click the Connect to Domo button.

Once you click on Connect to Domo, you will be navigated to the connection page. Enter the Connection name, Client ID, and Client Secret, and set the Visibility that the Connection will be established.
 To get the Client ID and Client Secret follow the below steps:
Open a new tab and use the below link

Note: To get the domain, copy it from the address bar of the Domo page, paste it into the box above, and click the Continue button.
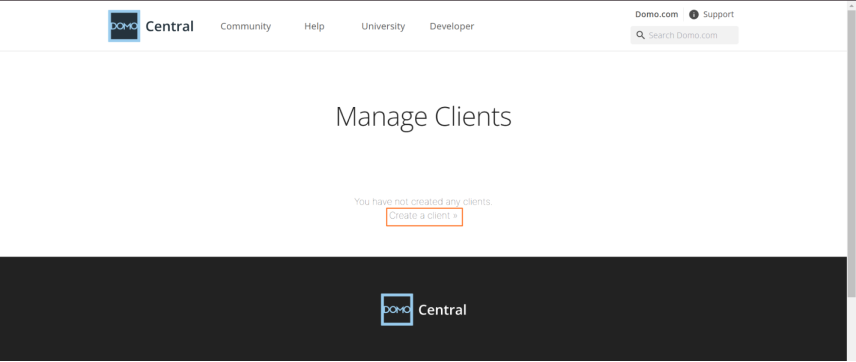
Click on the Create a Client option.

Enter the required details, and click the Create button.

Use the Client ID and Secret Code on the Profit.co Connect page to complete the integration setup

Once done click on Connect button.

Step 3
Now Create a key result Using Form in Profit.co where you want to integrate the Domo in a key result.
Note: Domo supports Percentage, Increase KPI, Decrease KPI, and Control KPI types.
Enter the Key Result name, and choose the required Key Result type and KPI. Select the Automate Check-in and choose Domo from the Connection dropdown.

A pop-up page will appear, here fill in the following details, choose Connection name, Dataset, and KPI Name, Choose the Aggregation Type, and click on the ADD button.
Note: A filter option is also available to help you obtain more precise data.

Note: You can also set the current value as the start value by clicking the Set as start value checkbox.
Once the Key Result is successfully created, click on the Check-in button and complete the Check-in to update the status value in the key result.


If you check in you’ll be redirected to the review page. Finally, you can update it to make progress to your key result.


Note: The automatic check-in will happen every 24 hrs based on the time the Key result is integrated with Domo connection.


