Zoho Analytics provides sharing and publishing options that allow you to easily create and analyze reports with your friends and colleagues. With Zoho Analytics Data storytelling capabilities you can craft stories with immersive presentations, or set up purpose-built analytical portals for sharing insights.
What you can do with Zoho Analytics and Profit.co Integration?
With Zoho Analytics and Profit.co integration, you can seamlessly pull data using queries to update key results automatically, ensuring real-time progress tracking.
Configure Zoho Analytics in Profit.co
Note: All the users can be able to configure the Profit.co <> Zoho Analytics Integrations.
Step 1
Navigate to Settings from the left navigation panel.
Click on Integrations, On the Connectors page, Select the User Level tab and under the BI Tools, enable the Zoho Analytics toggle.

After enabling it, click on the name, and choose the Preferences. Select the Integrations tab, and click on the Zoho Analytics Manage button.

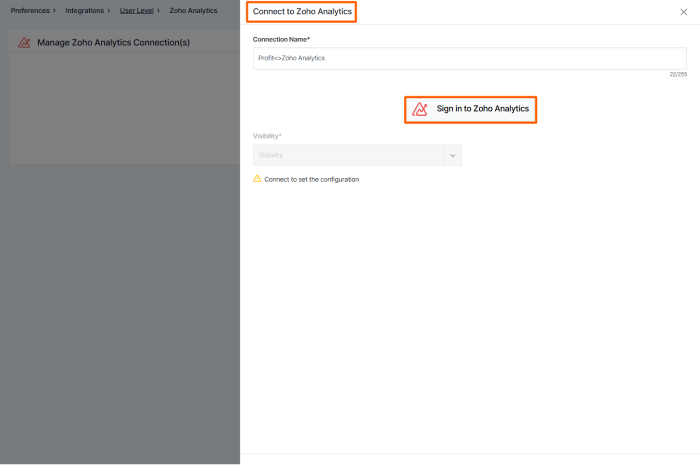
To establish a new connection click on Sign in to Zoho Analytics.

Step 2
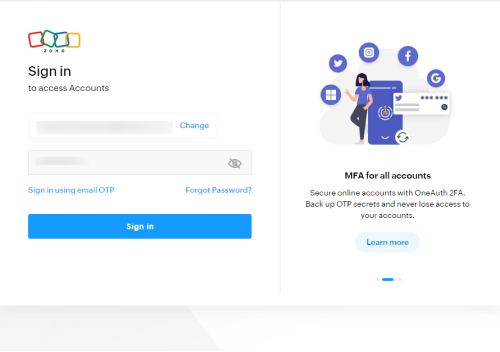
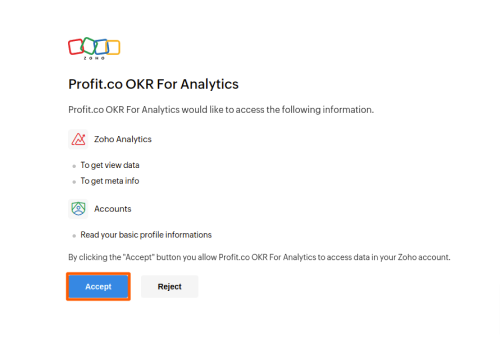
Enter the connection name click on the Sign in to Zoho Analytics button & log in using your Zoho Analytics credentials and grant Accept to establish the connection.
Step 3
Once the Integration is done, your connection will be established.

Automating Key Results with Zoho Analytics
Now Create a key result Using the Form in Profit.co where you want to integrate the Zoho Analytics in a key result.
Note: Zoho Analytics supports Increase KPI, Decrease KPI, and Control KPI types.
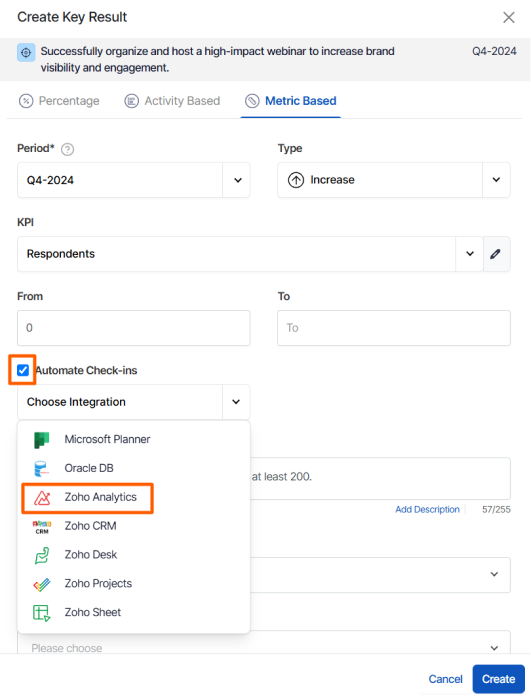
Enter the Key Result name, and choose the required Key Result type and KPI.
Select the Automate Check-in and choose Zoho Analytics from the Connection dropdown.
On the Connect to Zoho Analytics tab, Choose your Organization, WorkSpace, enter the Query and Run it. You will find the Current Value.

Note: You can also set the current value as the start value by clicking the Set as start value checkbox.
Once the Key Result is successfully created, click on the Check-in button and complete the Check-in to update the status value in the key result.

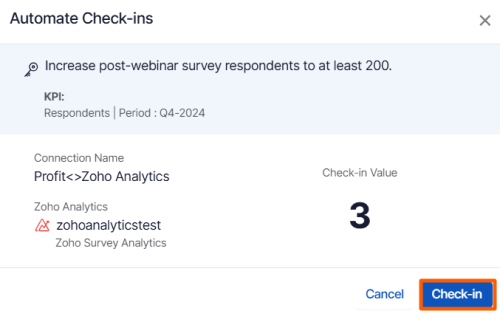
If you check in you’ll be redirected to the review page. Finally, you can Update it to make progress toward your key result.

