How to add additional attributes to the OKTA SCIM integration?
Category: General
Profit.co allows you to add additional attributes to the OKTA SCIM Integration.
What you can do with Profit.co – OKTA Integration
- With your OKTA single sign-on, you can access Profit.co OKR software using your existing company credentials.
- You can Import users from Profit.co to create new OKTA user
Step 1
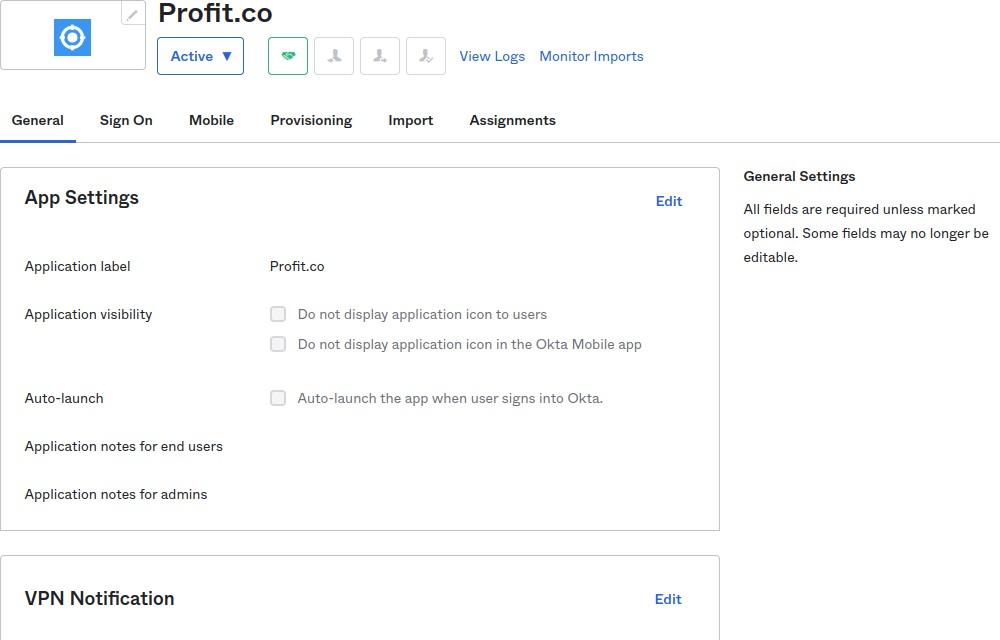
Open the Installed Profit.co App in OKTA
Step 2
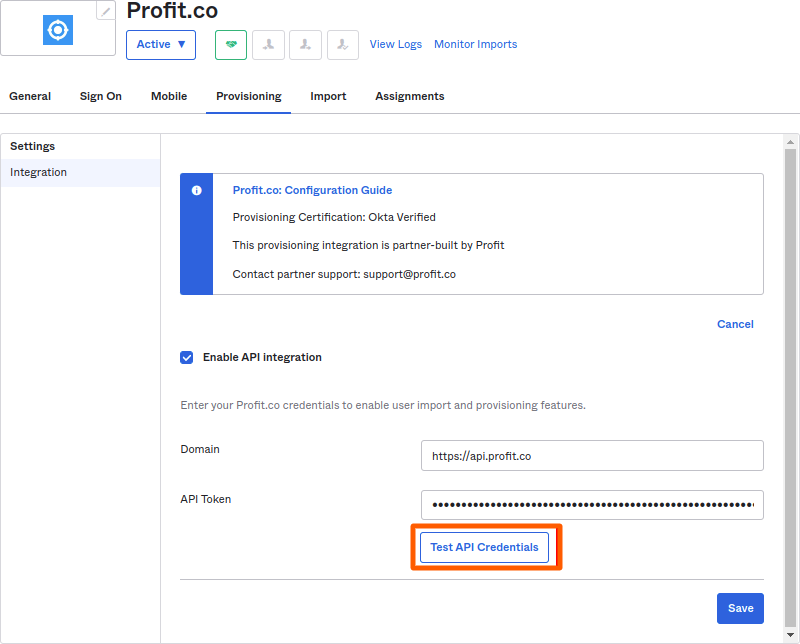
Choose the Provisioning tab and Configure the API (SCIM) Integration. Check the enable API Integration and Provide the Domain and API Token.
The domain should be either https://api.profit.co or https://eu2-api.profit.co
To generate the Bearer token go to Settings → Security → API Access and get the values of API Key and SCIM Key.
Form the Bearer Token in the following Format.
→ Bearer API_KEY: SCIM_KEY
Then, click on the Test API Credentials button.
Step 3
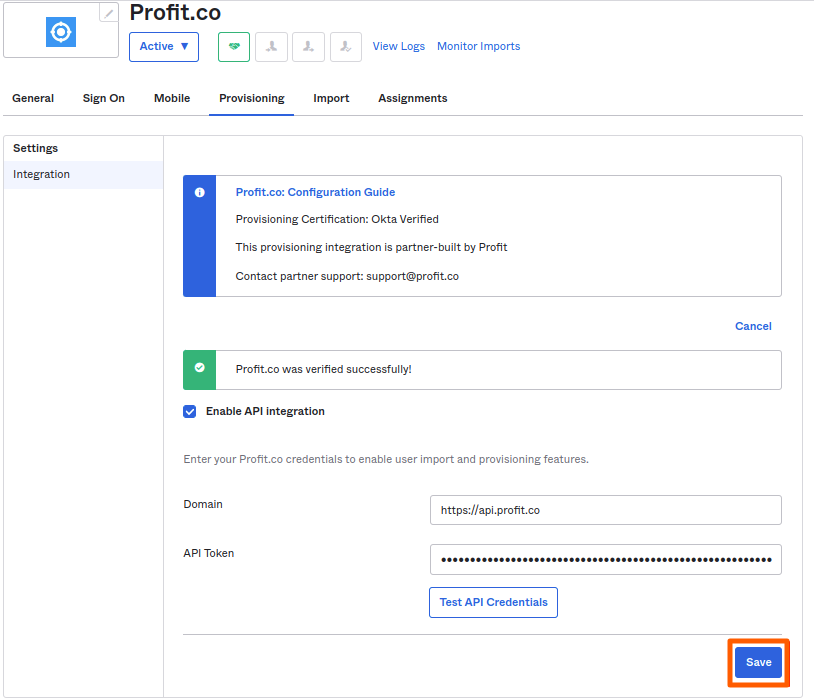
After Successful Configuration, Click on the Save button.
Step 4
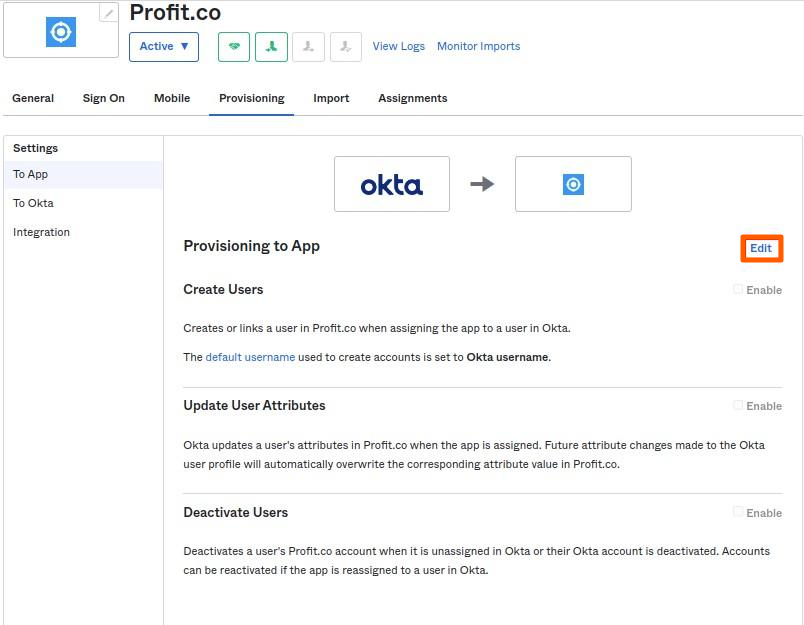
In the same Provisioning Tab, Two more options “To App” and “To Okta” are enabled now. Choose the “To App” tab and Click on the Edit button.
Step 5
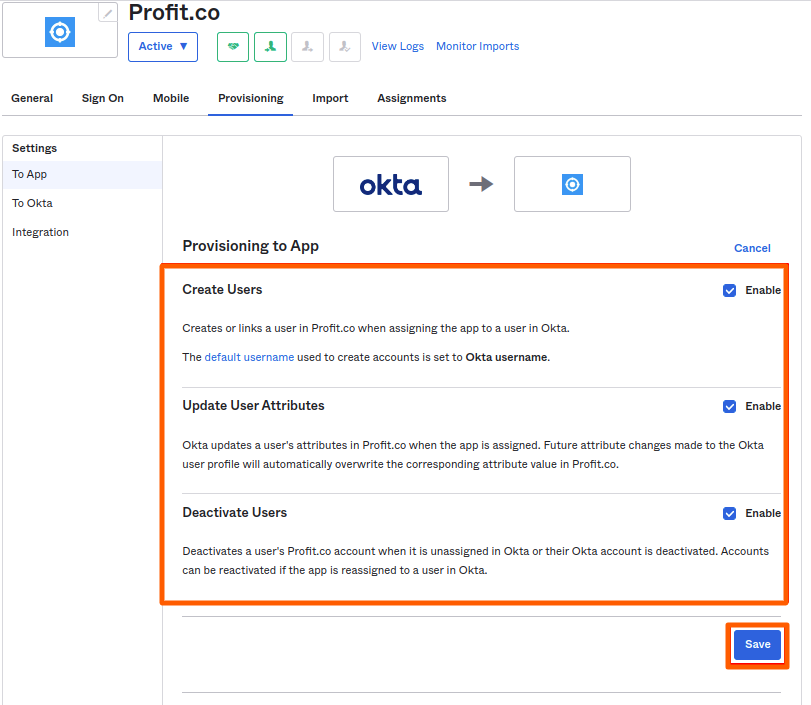
In the “To App” Option choose the following Options.
- Create User
- Update User Attributes
- Deactivate Users
and Click on the Save Button.
Step 6
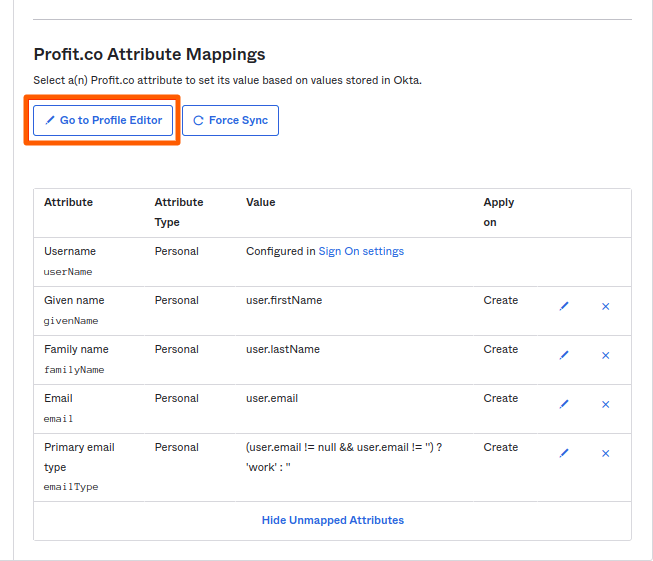
In “To App” Option, Go to Profit.co Attribute Mappings section. Then click on the “Go to Profile Editor” button.
Step 7
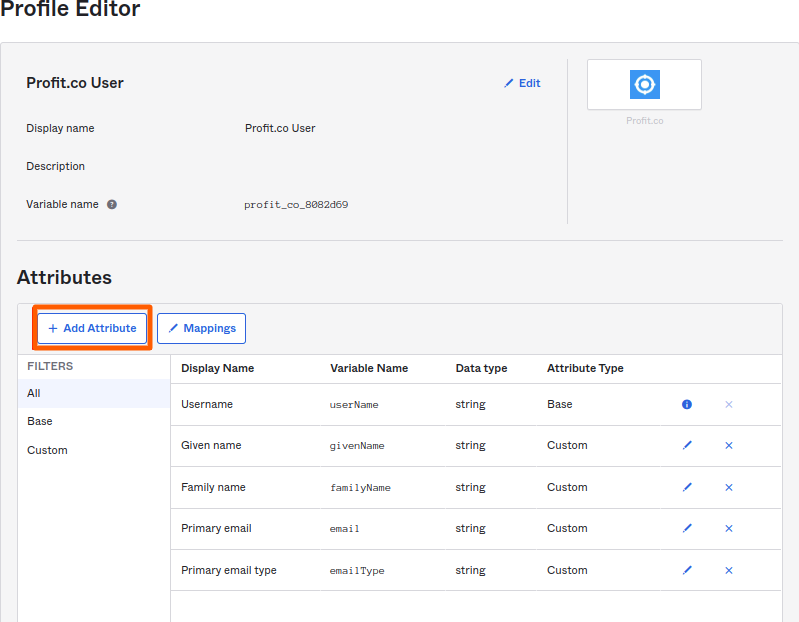
In Profile Editor, click on the “Add Attribute” button.
Step 8
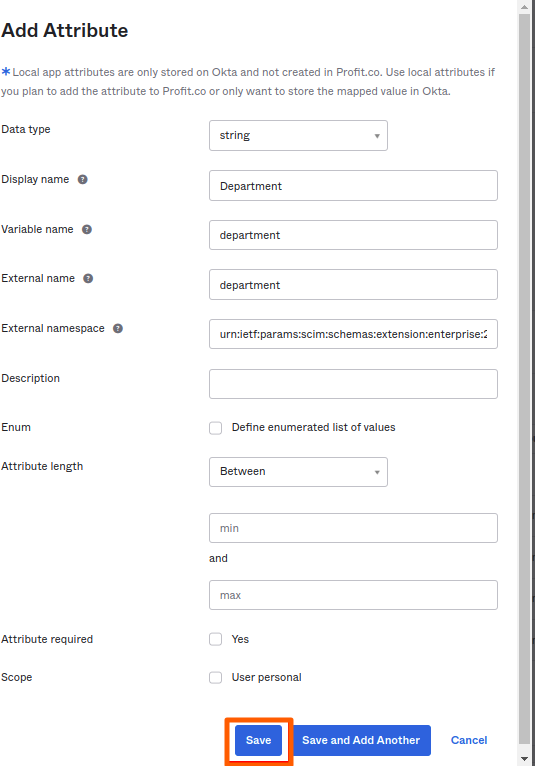
Provide the following details in the Add Attribute Dialog box for the Department Attribute and Press the Save button.
Step 9
Provide the following details in the Add Attribute Dialog box for Job Title Attribute and Press the Save button.
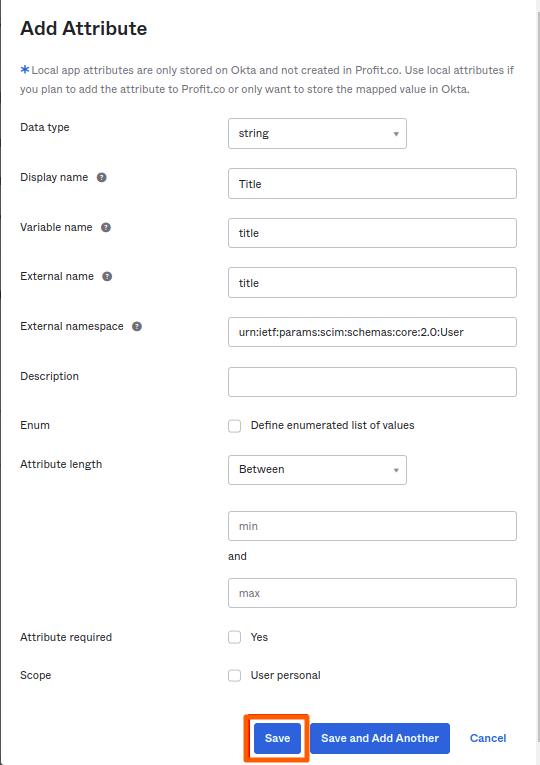
Step 10
Click on the Mappings button.
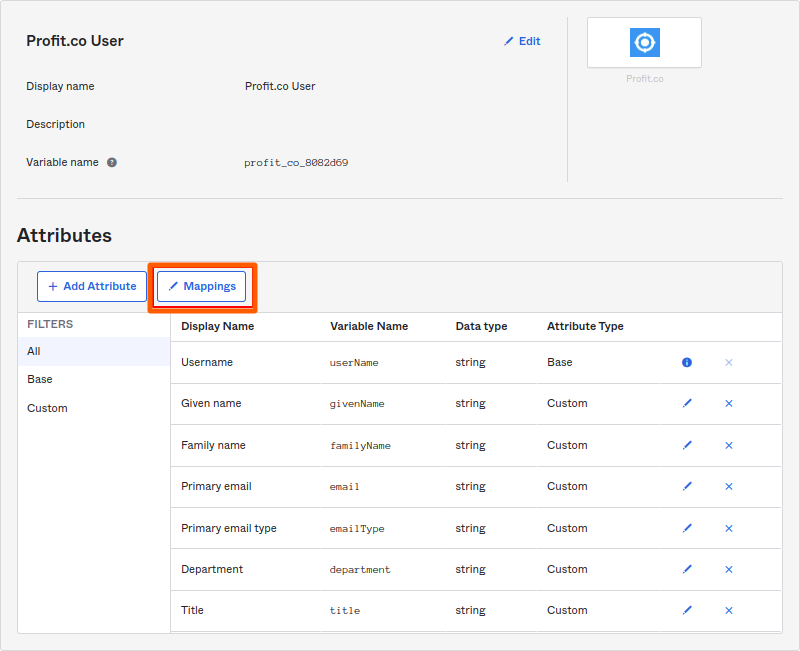
Step 11
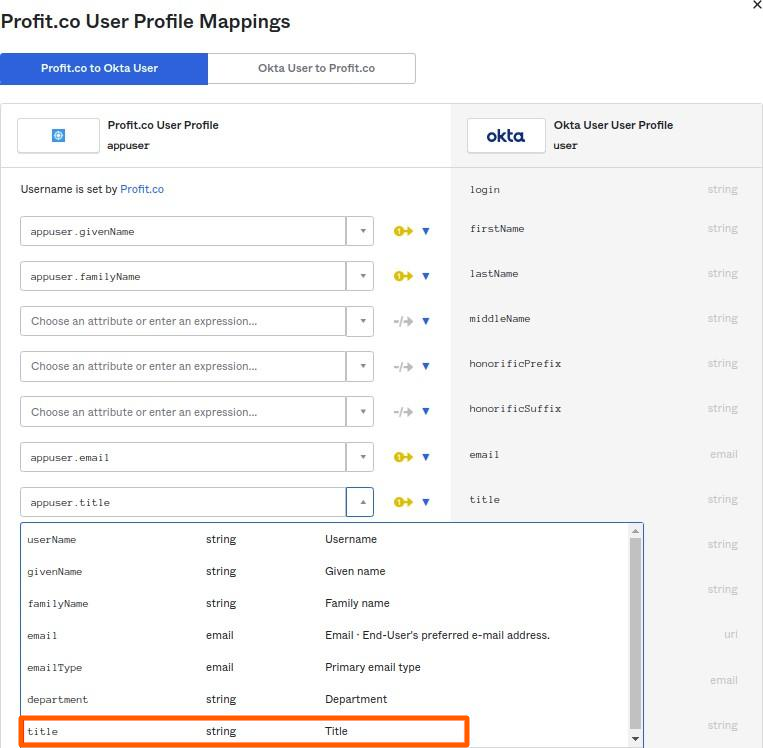
In Profit.co User Profile mappings, Choose Profit.co to OKTA User. Choose the title for Job title mapping.
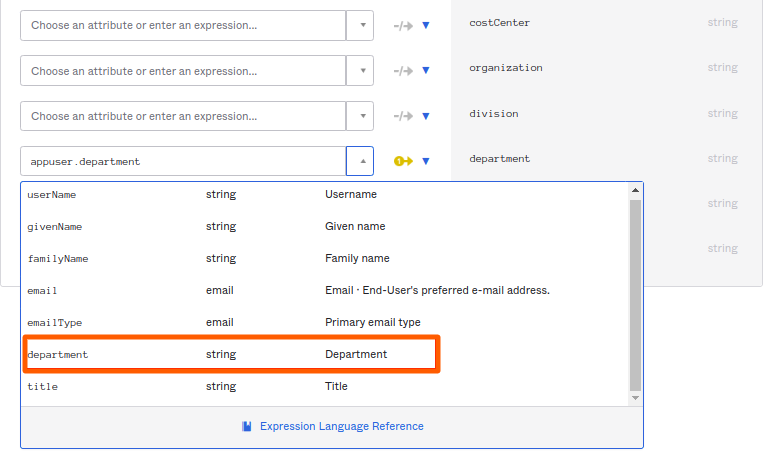
Choose a department for Department mapping.
Click on the “Save Mappings” button.
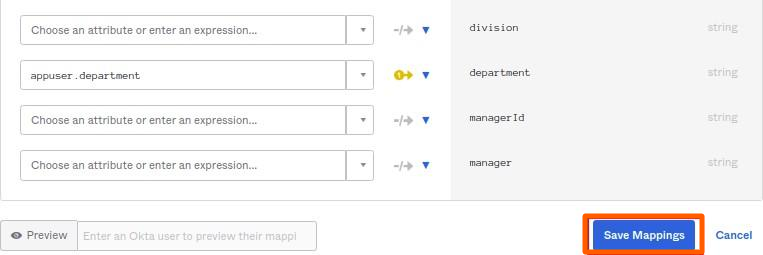
Then Press the “Apply Updates now” button.
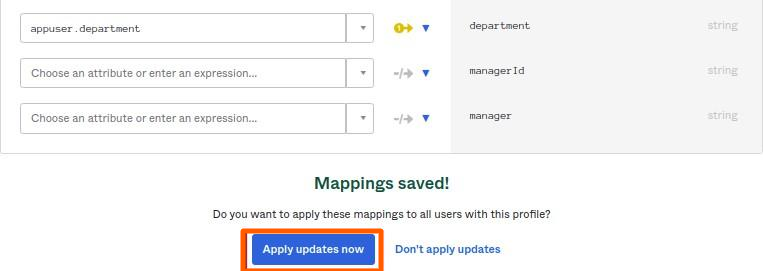
Step 12
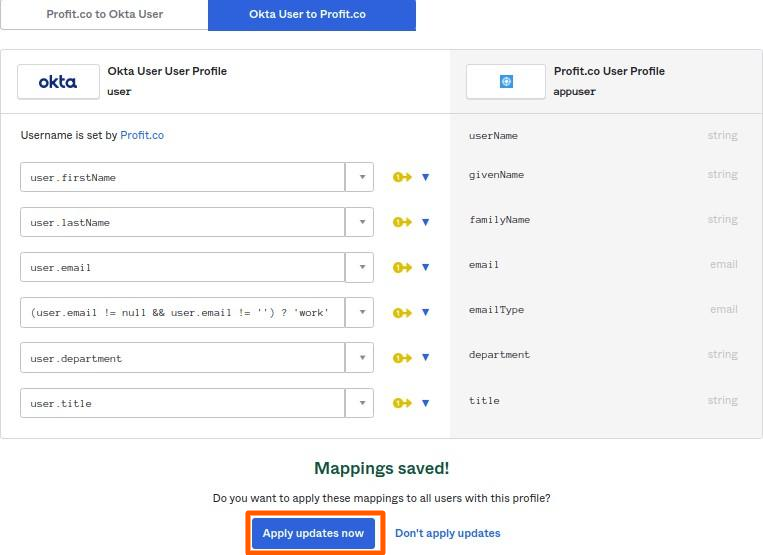
In Profit.co User Profile mappings, Choose OKTA user to Profit.co. Choose the title for Job title mapping.
Choose a department for Department mapping.
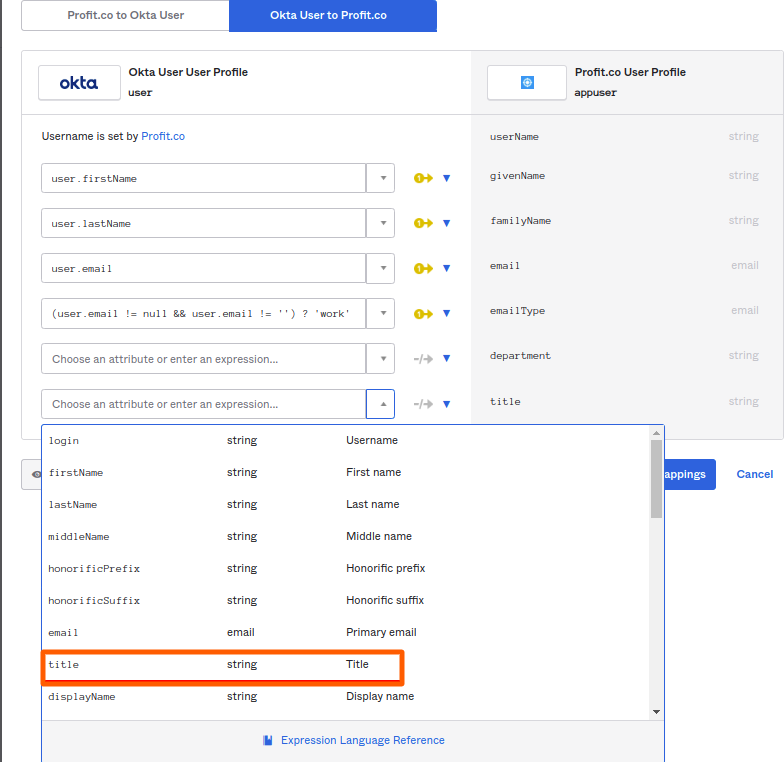
Click on the “Save Mappings” button.
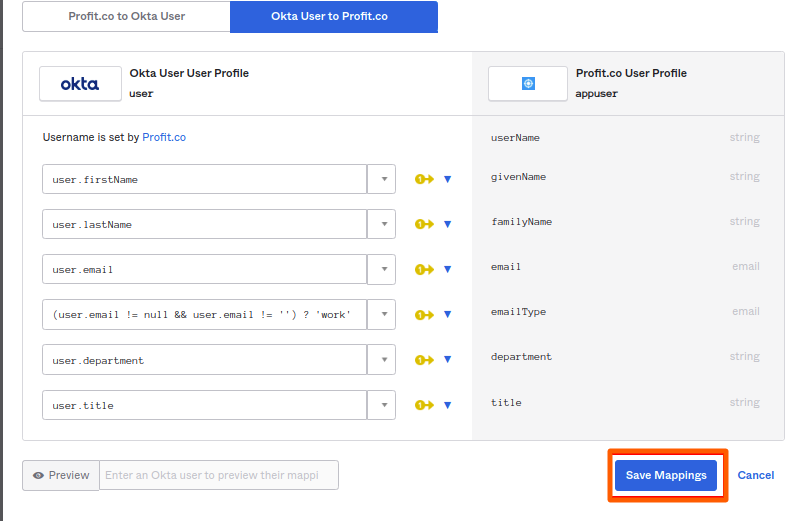
Then Press the “Apply Updates now” button.
Step 13
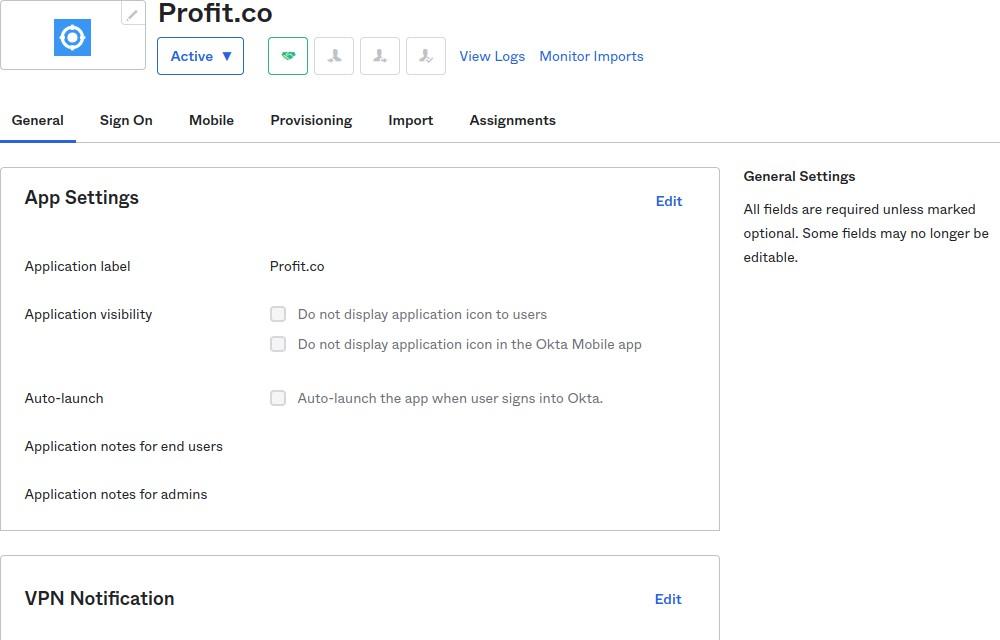
Open the Application again. Choose the Assignments Tab and assign the users to the App.
Step 14
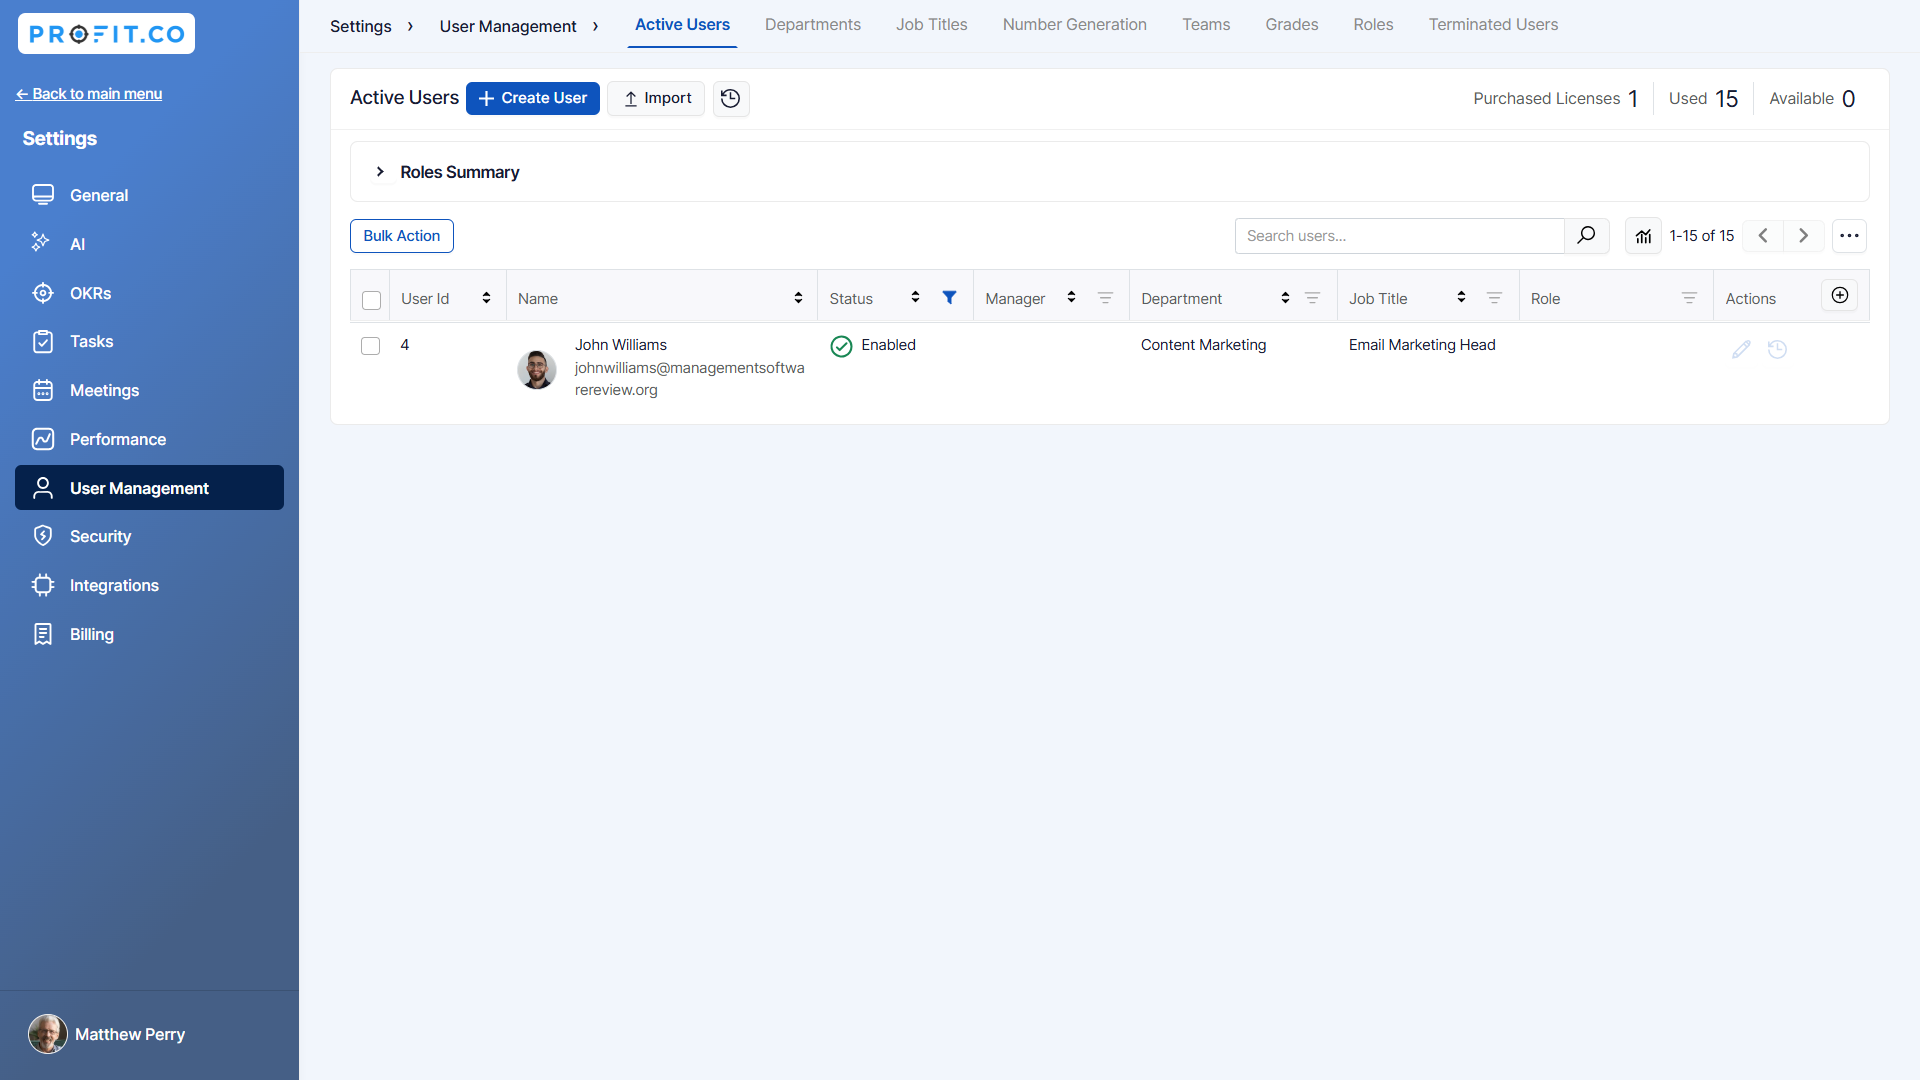
Assigned Users will get created automatically in Profit.co linked accounts with their Department and Job titles.
Related Questions
-
What are the pricing plans available in Profit.co? And how to download payment receipts?
Whether you're looking to upgrade for access to more features the team at Profit.co is available to assist you in ...Read more
-
How to Report Posts from the Homepage Feed in Profit.co?
Profit.co provides an option to report posts directly from the homepage feed. Why this feature? Reporting ...Read more
-
How to Restrict Assignments to Private Departments in Profit.co?
Profit.co allows you to restrict the key results assignments to Private Departments. Why this feature? Restricting ...Read more
-
How to manage multiple businesses with the same email ID and how to switch from one business account to another?
Profit.co provides an option to switch between business accounts when a user is having a multi-firm. Why this ...Read more
