


MS Dynamics 365 helps businesses manage customer relationships and streamline operations.It integrates various business functions into a single platform, allowing organizations to streamline operations, enhance customer engagement, and make data-driven decisions.
What can you do with Profit.co and MS Dynamics integrations?
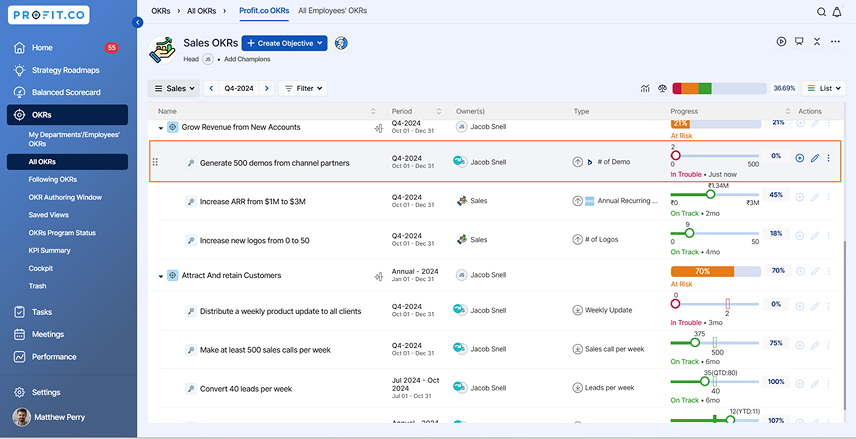
You can update the number of leads, Opportunities, cases, and activities from MS Dynamics to Profit.co key result and track the progress.
Configure MS Dynamics for Profit.co
Note: Only Super Users can configure the Profit.co <> MS Dynamics Integrations.
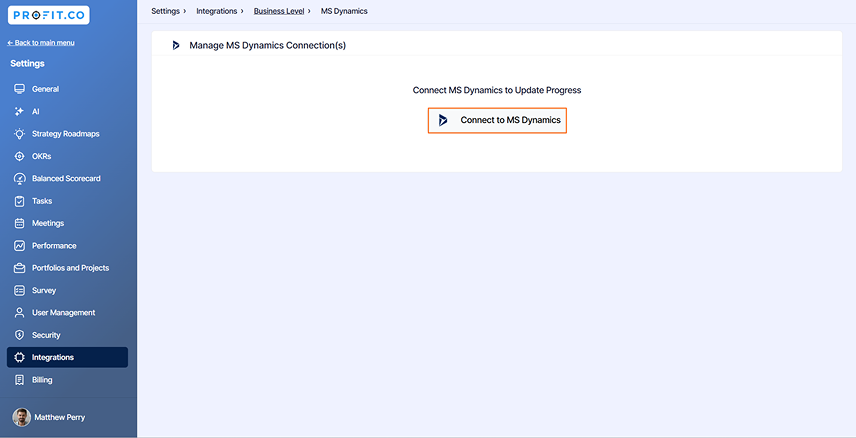
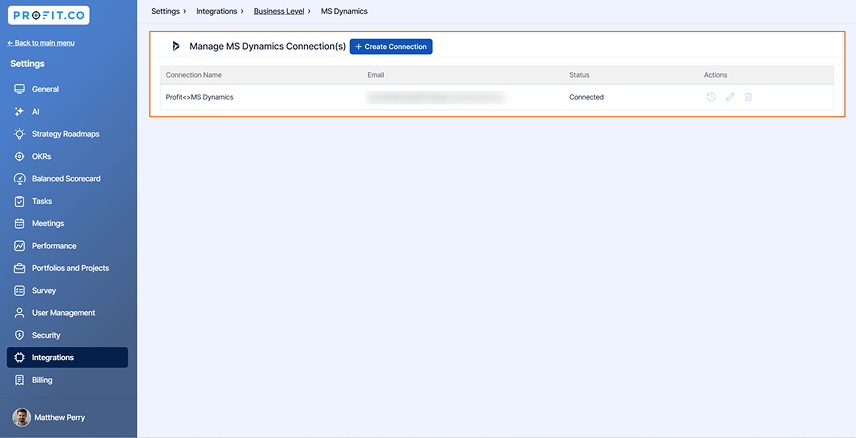
Step 1
Navigate to Settings from the left navigation panel. Click on Integrations, select the Business Level tab, and click the MS Dynamics Manage Button.

Step 2
Now click on the Connect to MS Dynamics button.
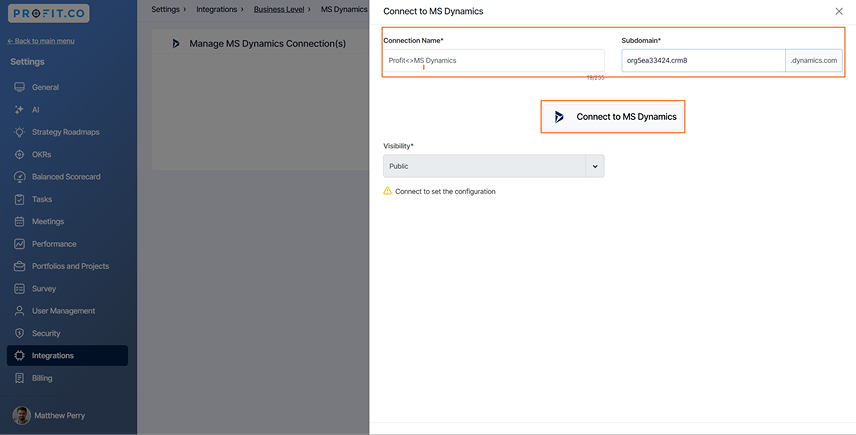
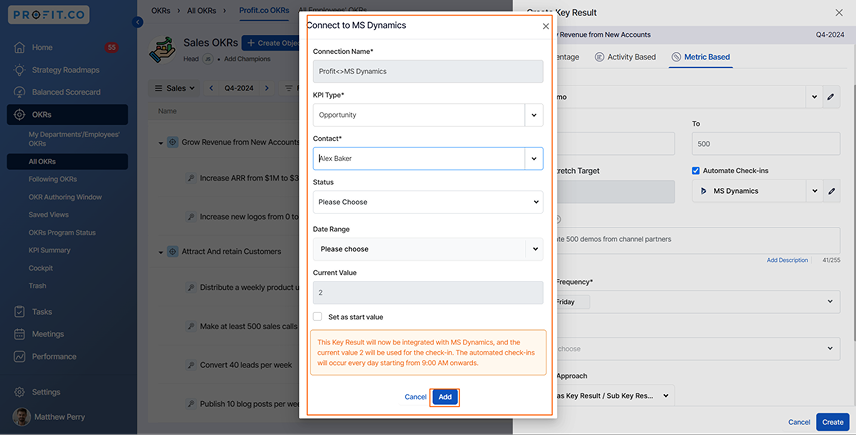
Enter the Connection name and add the Subdomain. Once done, click on the Connect to MS Dynamics Option.
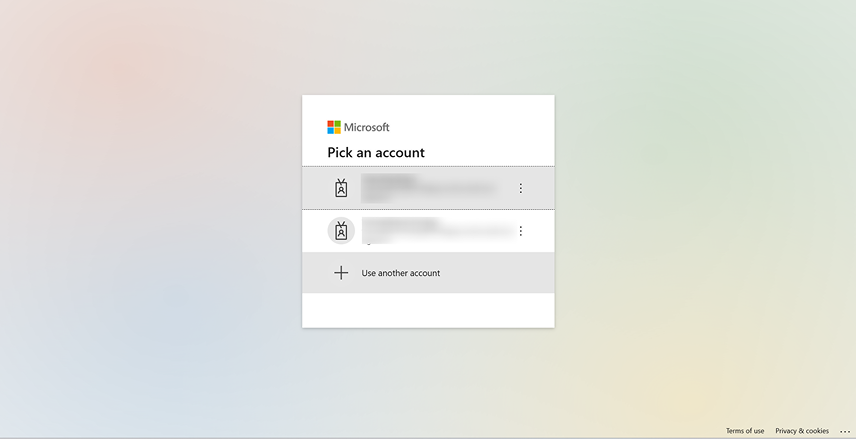
You will be redirected to your MS Dynamics account. Enter your User name and password.
To access data in your MS Dynamics, click Accept.
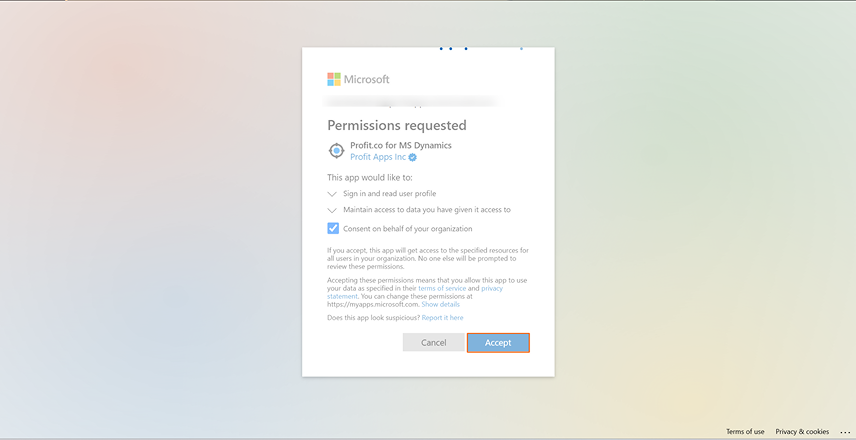
The connection will be established between your MS Dynamics and Profit.co accounts.
Step 3
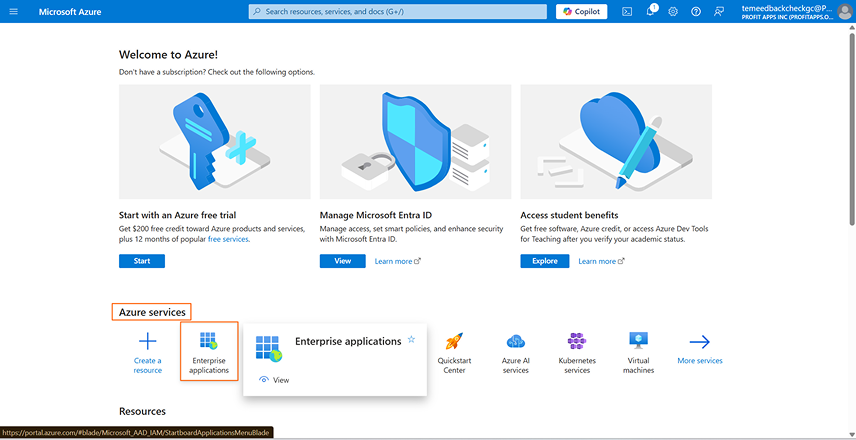
If you face any issues with the connection, grant the necessary permissions in your Azure account. To do this, follow the steps below:
Log in to your MS Azure account and click on Enterprise Applications under Azure Services.
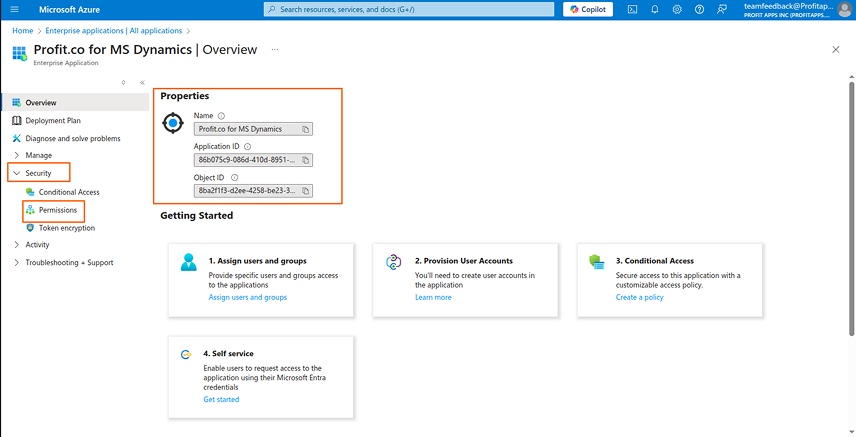
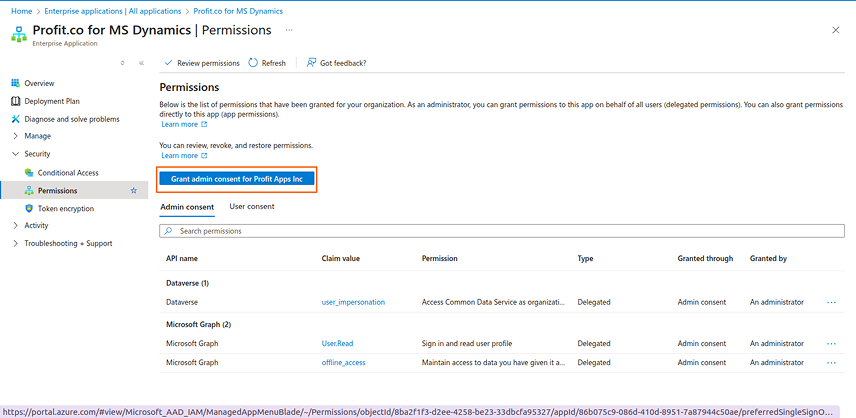
On the Enterprise Application select Profit.co for Ms Dynamics, click on Permissions under the Security section and grant Admin Consent.
Step 4
Now, create a key result using the Form in Profit.co where you want to integrate the MS Dynamics in a key result.
Note: MS Dynamics supports Increase KPI, Decrease KPI, or Control KPI types.
Enter the Key Result name and choose the required Key Result type and KPI.
Select Automate Check-ins and choose MS Dynamics from the Connection dropdown.
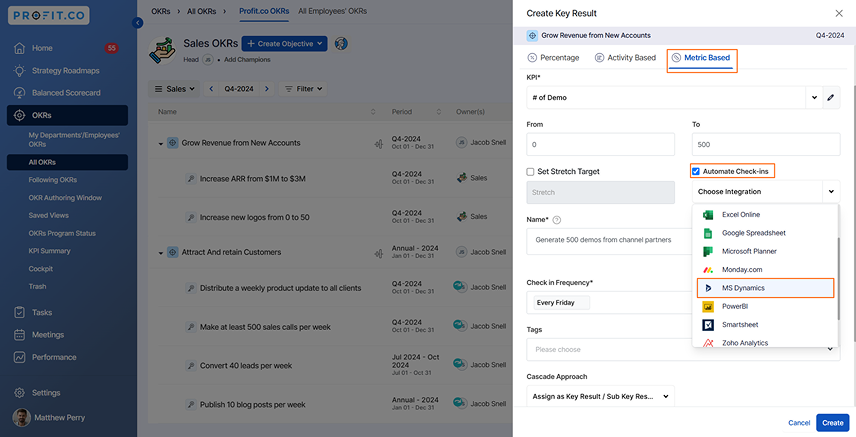
On the Connect to MS Dynamics tab, choose the required Connection, KPI Type, Contact, and all the required fields, and you will find the Current Value.
Then, click Add.
Note: You can also set the current value as the start value by clicking the Set as start value checkbox.
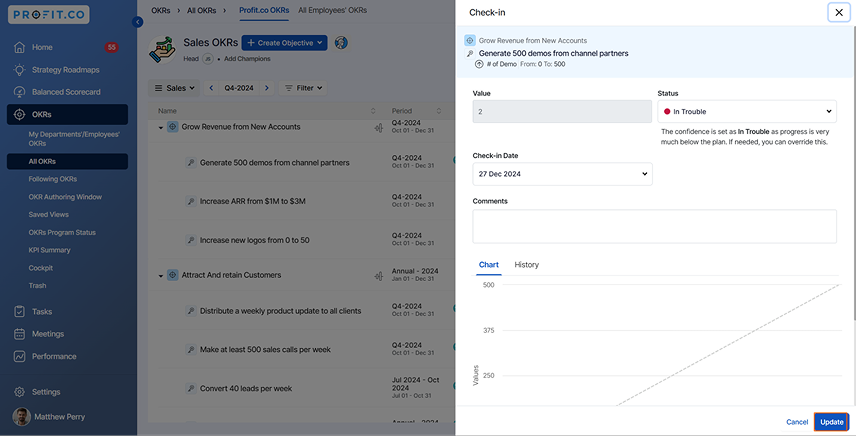
Once the Key Result is successfully created, click on the Check-in button and complete the Check-in to update the status value in the key result.

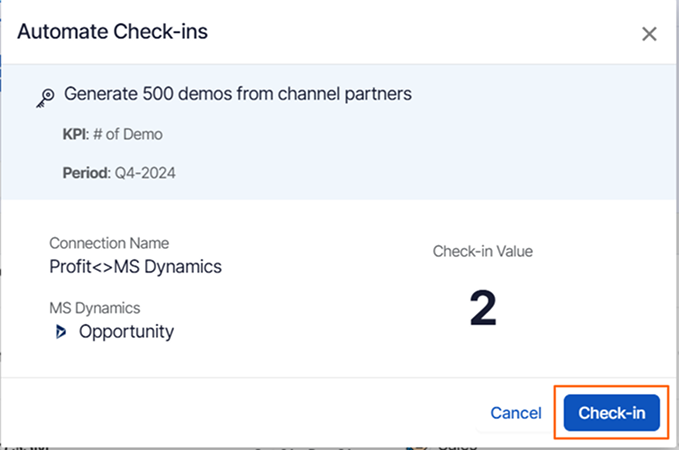
If you check-in you’ll be redirected to the review page. Finally, you can Update it to make progress to your key result.
Note: The automatic check-in will happen every day at 09:00 AM based on the user’s region.