Salesforce reports are a list of filtered records. As you would expect from the #1 CRM in the world, they are powerful, intuitive, and customizable, and they work well for organizations of all types and sizes. The Salesforce Report Builder is where users create reports, add filters, and define the fields to display
What you can do with Salesforce Report and Profit.co Integration?
Profit.co enables users to manage create, edit, and share Salesforce reports, and to Work with others on shared projects, in real time. Profit.co helps you to integrate Salesforce with your accounts and automate Key results progress.
How to integrate Salesforce Reports with Profit.co?
Profit.co enables users to integrate Salesforce Reports with their accounts and automate their key results progress update.
Note: To perform this task, you must have Salesforce credentials. The same email ID must be used to sign up for Profit.co.
Step 1:
Navigate to Settings from the left navigation panel.
Click on Integrations, On the Connectors page, Select the User Level tab and enable the Salesforce toggle.
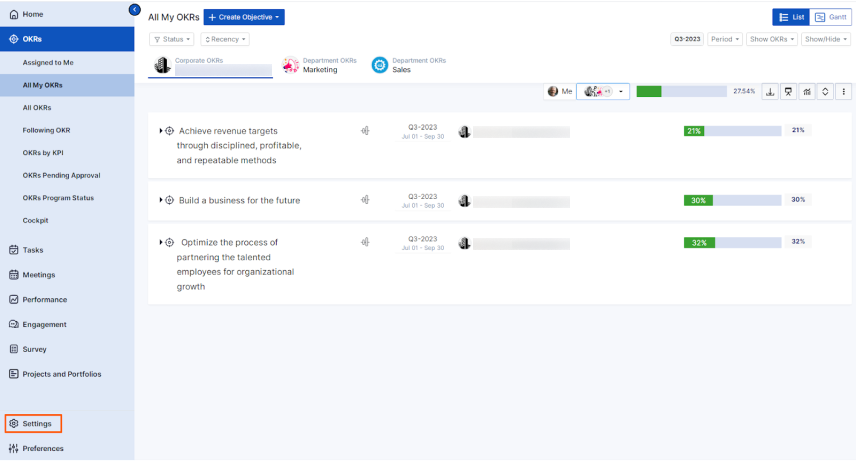
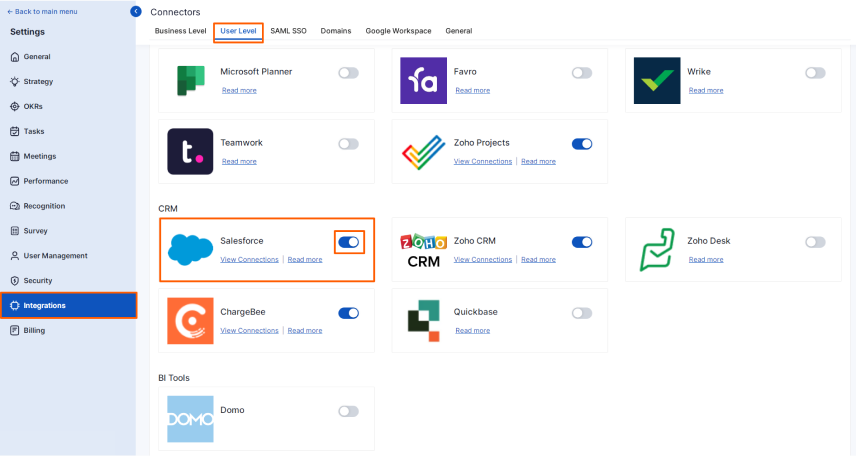
After enabling it, navigate to Preference from the left navigation panel, select the Integrations tab, and select the Salesforce Manage button to make a connection.
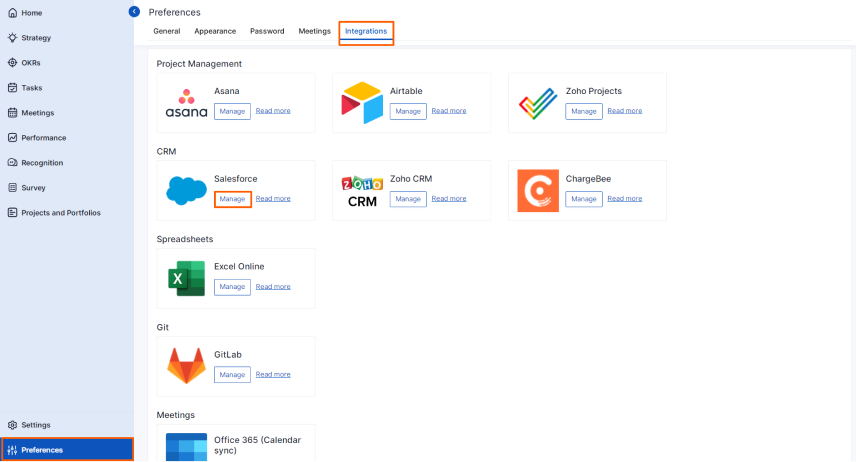
Click on Sign in to Salesforce.

Step 2:
Enter your Salesforce username and password and click Log In.
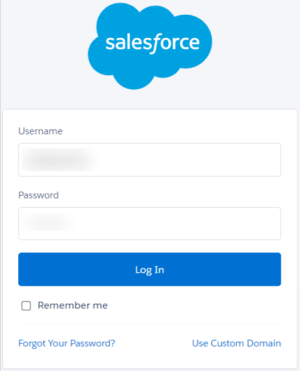
The Salesforce Integration connection will be successfully configured.

Step 3:
Now Create a key result Using the Form in Profit.co where you want to integrate the Salesforce in a key result.
Note: Salesforce Reports supports Increase KPI, Decrease KPI, or Control KPI type.
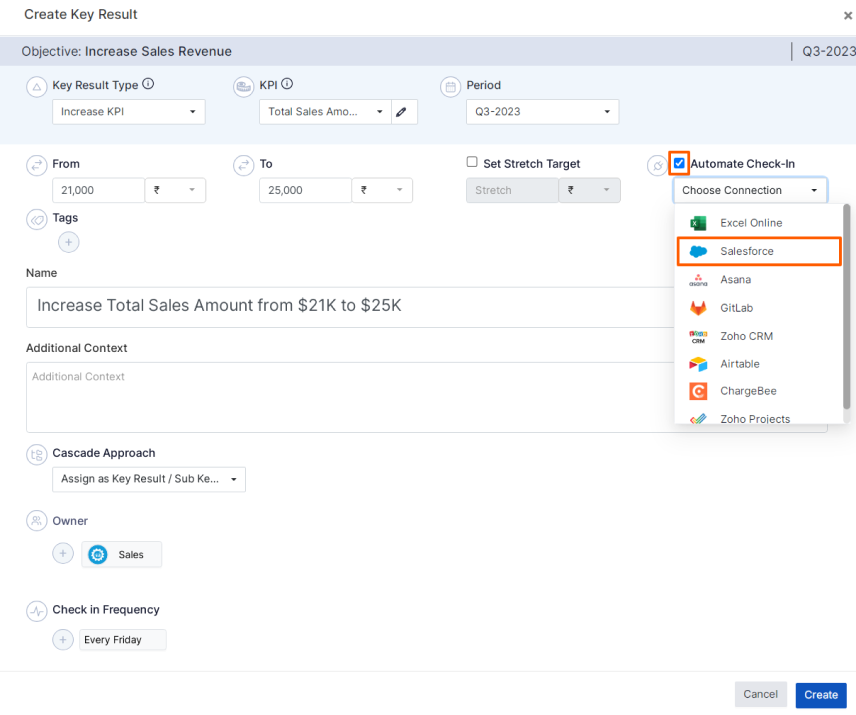
Enter the Key Result name, and choose the required Key Result type and KPI.
Select the Automate Check-in and choose Salesforce from the Connection dropdown.
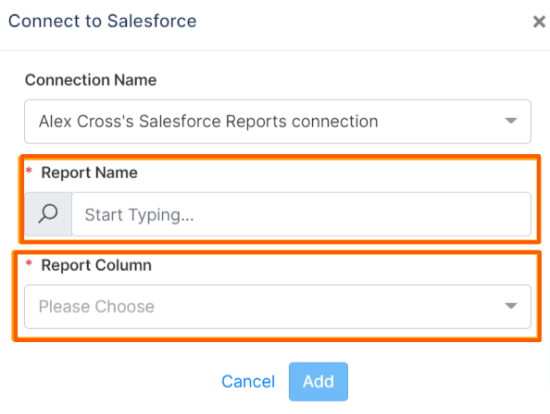
While connecting to Salesforce, your email ID will be present by default. Select the Report Name and the Report Column you wish to use to track your key result.
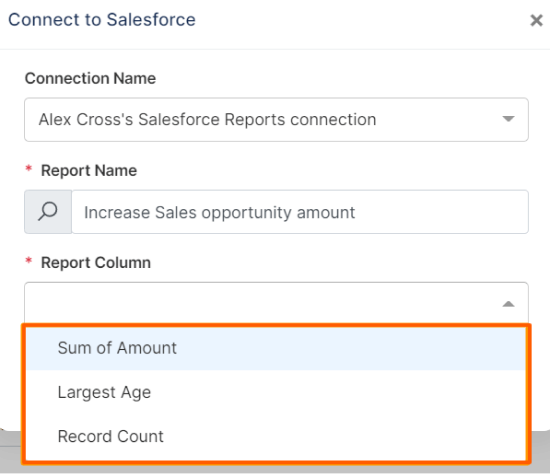
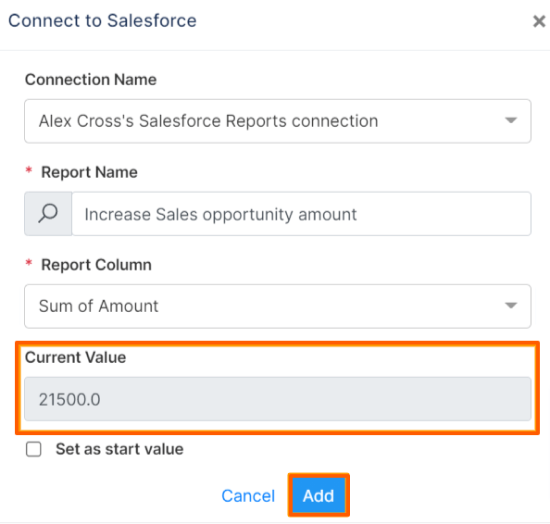
The current KPI value will be provided directly from your Salesforce report.
Finally, click Add.
Note:Note: You can also set the current value as the start value by clicking the Set as start value checkbox.
Step 4:
Once the Key Result is successfully created, click on the Check-in button and complete the Check-in to update the status value in the key result.

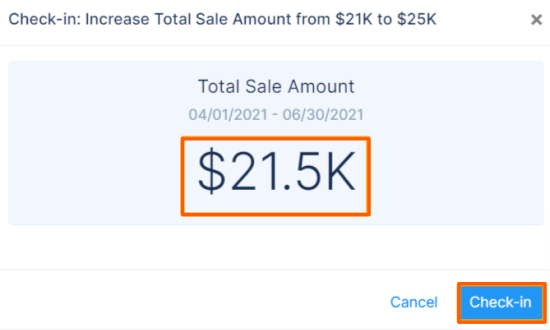
If you perform check-in you’ll be redirected to the review page. Finally, you can Update it to make progress to your key result.
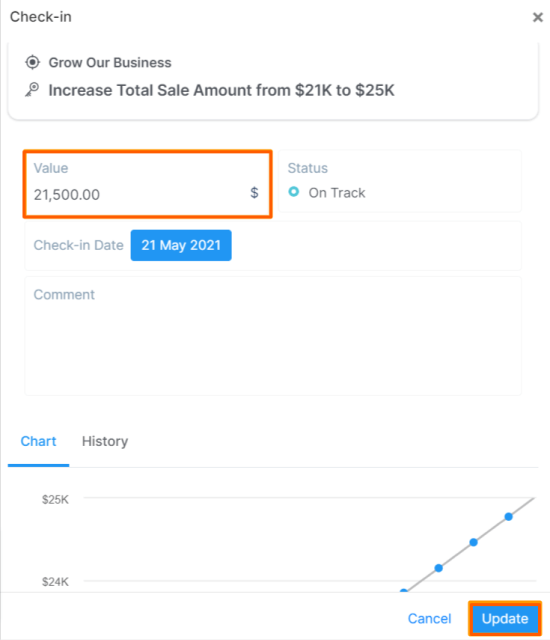

Note: The automatic check-in will happen every day at 09.00 AM based on the user region.